Panipopo Coconut Buns

Panipopo coconut buns
Panipopo Coconut Buns

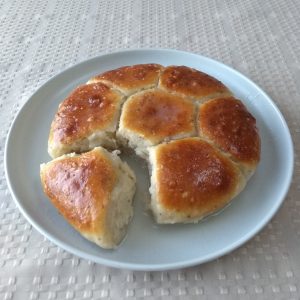
First request for a recipe – this one’s for you Kate! These sweet, soft, coconutty buns go so hard at potlucks you’d think they were teenage boys during lockdown.

I first became aware of these at the start of second year but it wasn’t till much later that year I decided to give them a nudge. They essentially semi-sweet bread rolls baked in a sweet coconut milk/sauce.  I think I fluked the first ones – they were insane! Since then, it has felt like I’ve made little errors each time, slowly improving, and now I make them with some degree of consistency.

I have a theory that you have to make something five times before you’ve actually got it down. The first time you might get it spot on, but you don’t know where you can trip up until you do, which might happen the second and third times, but by the fourth and fifth you have a pretty good idea of what’s going on. Having said that, I have made these so many times now and seem to still be finding ways to mess up. There’s probably many ways to make this, and I certainly seem to do it slightly differently every time, but here’s a framework anyway.

These are worth the effort, so shall we?

Panipopo – Coconut Buns (vegan)
Serves: 1-many (scale up as you need)
Prep time: 4.5 hours
Cook time: 25-30 minutes
Total time: 5 hours

Ingredients (for the dough):
300g flour
180g water (60% hydration but we’re adding other liquids)
30g oil (necessary to make the dough super soft)
Teaspoon of chia seeds (as an egg substitute and adds a funky texture)
30g sugar
1/2 tsp salt
1-2 tsp yeast

Ingredients (for the coconut sauce):
Equal parts coconut milk and water, nominally 100mL of each
~30g sugar (to taste)

Instructions:

  1. Mix 180g water, 30g sugar and one or two teaspoons of yeast in a cup or container. Give it a good stir to dissolve the sugar, and wait for the yeast to bloom (about 10 minutes).
  2. Soak the teaspoon of chia seeds in a small amount of hot water to create an egg substitute. This is probably not really necessary, so if you don’t have chia seeds you can just leave out this step. I just like the texture the chia seeds provide.
  3. In a large bowl, mix all the ingredients for the dough together now – flour, salt, oil, chia seeds and yeast mixture. I normally do this with a butter knife and give it a good stir like a KitchenAid would. The dough will be quite sticky but that’s what we want.
  4. We’re now gonna knead the dough until just after it starts to come together (you’ll know because it will sort of form a stiffer mass and stop sticking to surfaces). How ever you choose to do this, I don’t think it really matters. For wet doughs, I like the slapping technique shown here:
    https://www.youtube.com/watch?v=Qzx7dxuvaCo
  5. Place the dough into a greased bowl large enough to accommodate a doubling in size. Cover, and place in a warm place for around 4 hours until the dough has doubled in size. You can speed up this process by putting it into a warmed oven.
  6. Once doubled in size, take the dough out of the container and knock the air out of it, which you can do by gently kneading the dough a tiny bit more, or folding it. Now divide it into pieces (as many buns as you want to make). Roll into balls, this is my preferred technique (skip to 1:50):
    https://www.youtube.com/watch?v=Gx2Sf3XqkhQ
  7. Place the balls into a deep dish that you’ve pre-greased with marge. A cake tin works well or just whatever you want to use. You’ll want to place them about 1 cm apart – when they proof for the next 30 minutes or so, they’ll flatten out a bit, press into each other, then rise up. And that’s key because if they’re too far apart, they’ll flatten out and you’ll have flat buns at the end.
  8. Cover your dish and wait for the balls to double in size, around 30 minutes. In the meantime, mix the equal parts coconut milk and water, and dissolve the sugar into it. This sauce should be quite sweet and that’s how we want it. Preheat the oven to 190 degrees C.
  9. Once the dough has proofed, pour your coconut sauce over the top til you can just see the tops of the buns. This one requires your judgement and probably a bit of experimentation – don’t add too much as they might not cook properly, but also not too little or you won’t get the taste of coconut.
  10. Bake for around 25-30 minutes, at which point they should be nice and golden on top.

Concluding remarks: It’s a long recipe, but not as much work as it actually seems. Highly worth trying!
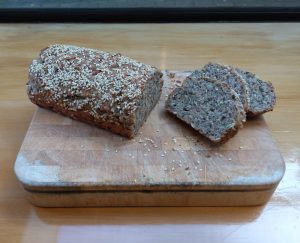
Paucity of Flour: No-Knead Seed Bread

No knead seed bread
No-Knead Seed Bread

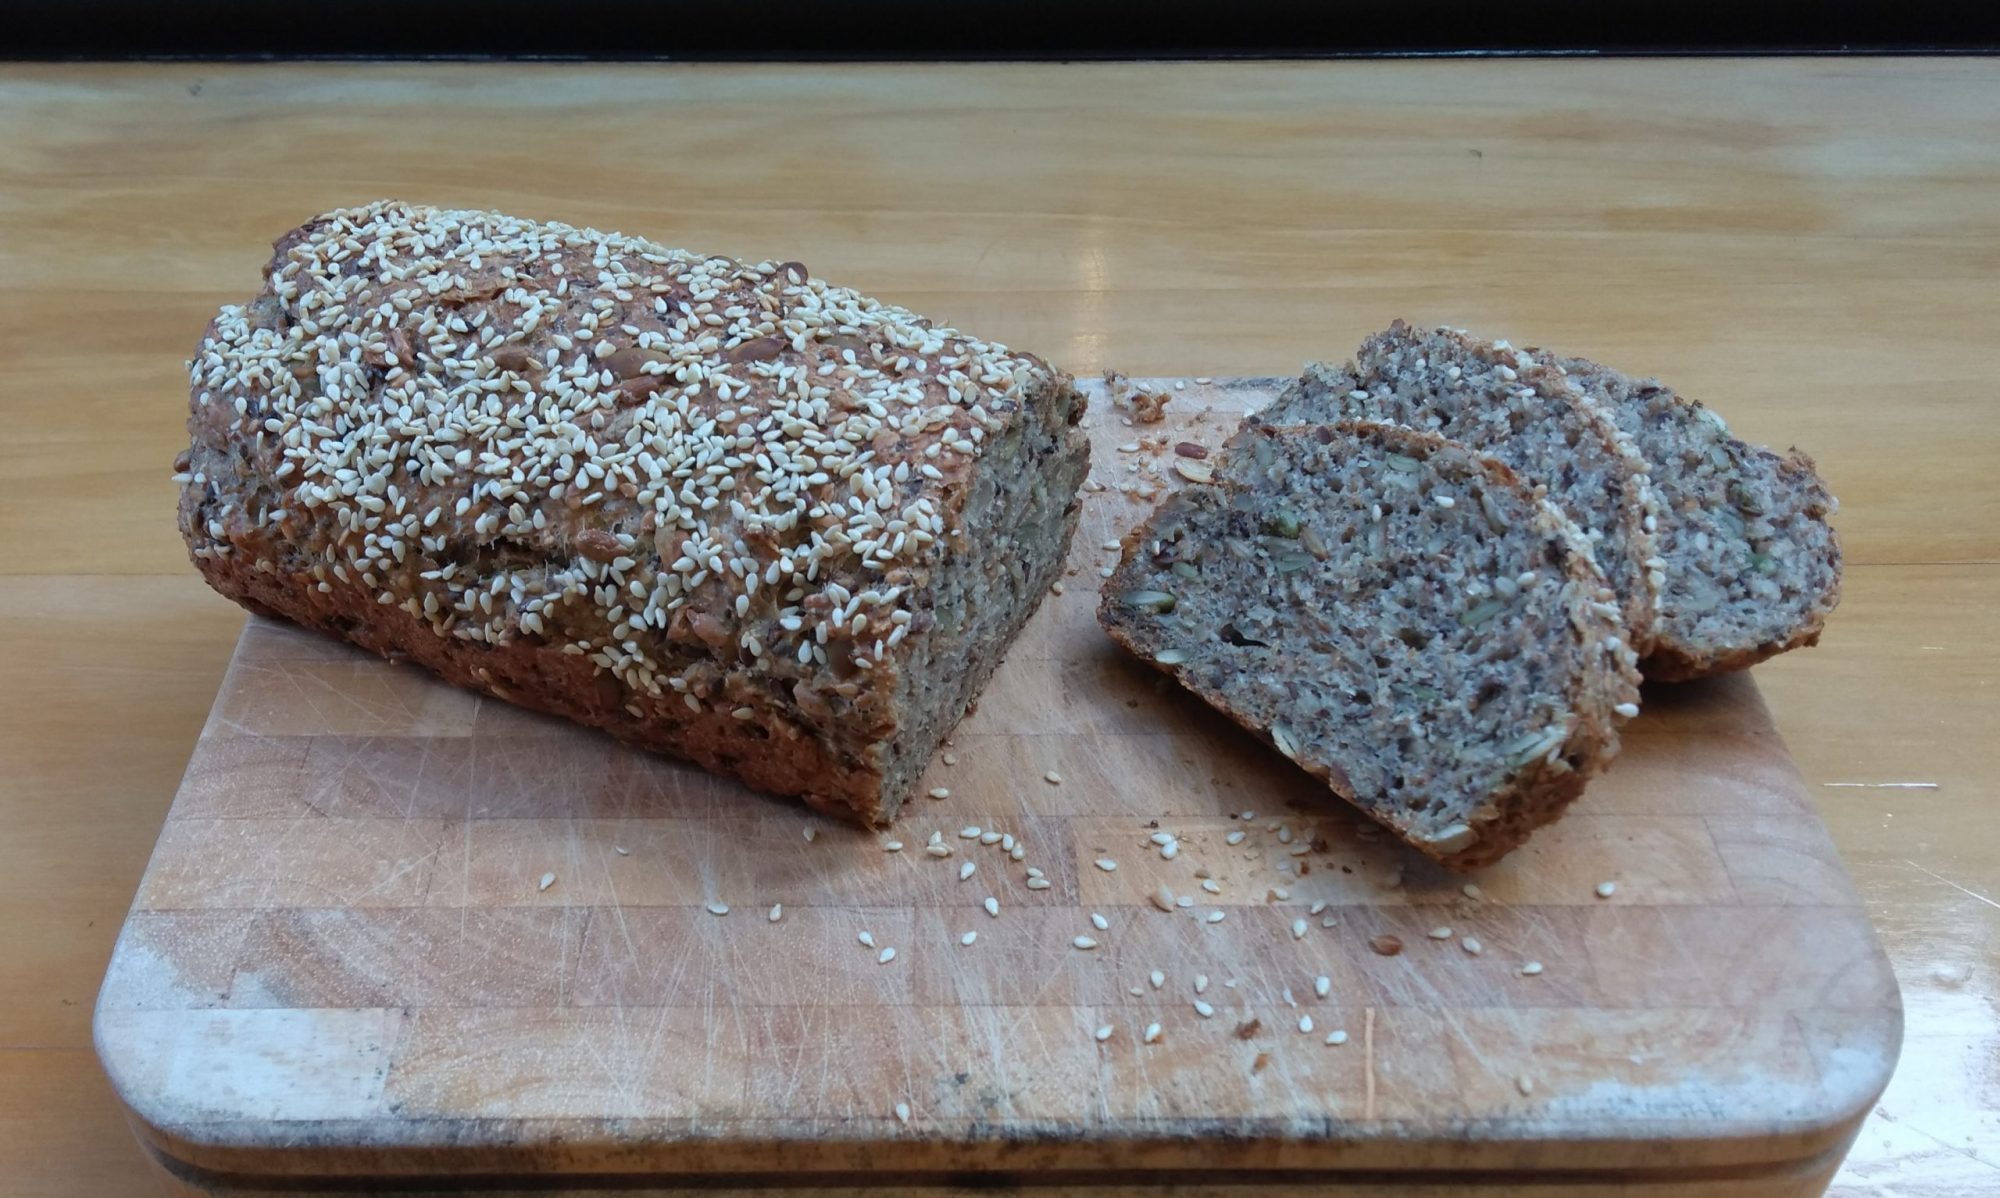
Pressure makes diamonds, and this one turned out to a gem. With flour supplies running low in the house and empty shelves at the supermarket, I had to get inventive to get my baking fix. What they did have however was heaps of seeds, so I decided to make a bread packed with seeds and the little flour I had left.

I found a bunch of different recipes online all slightly different. Some used baking powder as the leavening agent, but I enjoy the magic of yeast, so gave that a go instead. Many called for the use of milk and eggs but I wanted to make this vegan to be more accessible. Didn’t have any idea how it would turn out but it ended up mean!

The hydration of the dough is well over 100% which makes it difficult to handle, but is necessary due to the seeds which soak up the liquid. For that reason it’s no-knead, which makes it no effort at all to make.

I baked this in the morning and served it for lunch with my spiced capsicum and avo on toast which you can find here:
https://sebcooks.blogtown.co.nz/2020/03/27/spiced-capsicum-on-avo-toast/

Anyhow let’s get cracking!

No-knead seed bread (vegan)
Serves: 4 (about 10 slices)
Hands-on time: 10 minutes
Hands-off time: 12 hours
Cooking time: 45 minutes

Ingredients:

150g high-grade flour
150g wholemeal flour
330g water
1 tsp yeast
2 Tbsp sugar
50g oil (any oil is fine)
Mixed seeds: (literally use anything you want/have!)
40g linseeds
40g sesame
40g sunflower
40g pumpkin
40g chia (this might be important because chia can act as an egg substitute)
A good sprinkle of salt ~ I used 1-2 tsp of coarse rock salt

Instructions:

  1. In a dry pan over medium-high heat, toast the seeds until fragrant. Add a good sprinkle of salt – it helps to dry out the seeds. This might take around 5 minutes.
  2. in the meantime, mix the 330mL water, two tablespoons sugar and one teaspoon of yeast in a bowl and give it a good stir.
  3. Once the seeds are done, you could let them cool for a short time or put them straight into a large mixing bowl with the flour. The dry mixture will now be quite warm, but not painfully so. If it is painfully hot, don’t add the liquid mix until it has cooled down because this will kill the yeast.
  4. Once you’ve added the liquid mixture, give it all a quick mix, adding the 50 grams of oil as you go. Continue just until the point that everything looks properly mixed – there’s no point doing any more. The dough will now be very liquid and sticky and likely quite warm, but this is fine.
  5. Cover and let it prove overnight.
  6. Once proved, you’ll see that the gluten structure has developed in the dough and it is much easier to handle. Knock the air out of the dough but giving it a few folds like this:
    https://www.youtube.com/watch?v=XzG90C2PExI
  7. Grease a loaf tin, roughly shape the dough to fit and pop it in.
  8. Heat the oven to 200 degrees C and let the dough rise while the oven heats – by the time the oven is ready, the dough should have had long enough to rest. It’s not going to double in size like other dough due to the low flour content.
  9. Top with more seeds if you like and bake for around 45 minutes or until golden brown on top and it sounds hollow.

Concluding remarks: This loaf may seem more expensive to make than your regular bread, but I would calculate it to be less than $3 for the ingredients all up. A super healthy loaf, would highly recommend. 8/10

Today’s Experiment: No-Knead Cumin and Turmeric Bread

Cumin and turmeric bread
Cumin and Turmeric Bread

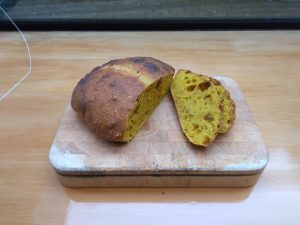
I recall in first year trying some funky yellow bread from the Otago Farmers’ Market – the fragrance from the cumin seeds and yellow aesthetic from the turmeric was what stuck with me. Back then I would have had no idea how to go about recreating such a creation, but I decided to give it a go because what else is there to do at the moment?

This one turned out pretty well – great flavours and a nice open crumb (interior of the bread). However, I think I needed to bake for an extra 10 minutes as it was possibly a fraction underdone. I’d give this bread a solid 7/10 and one to definitely make again.

The process of making this dough is super simple – no kneading involved – instead there’s a folding technique that you can do once or twice, then leave it overnight to rise. I went with an 80% hydration dough as I wanted an open, airy interior, but this makes the dough a bit more sticky. Not really an issue as there’s no kneading.

Anyhow here it is.

No-knead cumin and turmeric bread (vegan)
Serves: 3-4 (maybe 8 slices – it’s a small loaf, feel free to upscale)
Hands-on time: 10-15 minutes
Hands-off time: ~4-24 hours
Cooking time: 30-40 minutes

Ingredients:
300g high-grade flour
240g water (80% hydration, note that for water 100mL = 100g)
1/2 tsp salt
1/4 tsp yeast (this gives it a slow rise, but add more if you need a faster rise)
1 Tbsp turmeric
1 Tbsp cumin seeds
Splash of olive oil
1 tsp sugar (optional – I only added it because I thought it might balance the bitterness of the turmeric)

Instructions:

  1. In a dry pan, toast the cumin seeds to release the fragrance.
  2. In a large bowl, mix the dry ingredients (flour, salt, yeast, turmeric, cumin seeds, sugar). Then add the 240g of water and a splash of olive oil (nominally 1 tsp).
  3. Stir with a butter knife until the yellow colour looks evenly spread throughout the dough. It will be very rough at this stage.
  4. You could now probably just wait 12-24 hours for the dough to double in size and then turn it out and use it. However I folded the dough a couple of times in that waiting time to improve the structure of the dough. Here’s how to do that:
    https://www.youtube.com/watch?v=eTo_Ho5C6sk
  5. With wet hands on a dry surface, turn the dough out and shape it into a boule. This one takes practice and is definitely not something I’m too great at. Here’s how to do that:
    https://www.youtube.com/watch?v=oCM3wHFk2SE
  6. Once you’ve shaped the dough pop it onto your baking tray (I used baking paper). Let it rest for about 30 minutes. Preheat oven to 220 degrees C in the meantime.
  7. Once rested, bake in the oven for 35-40 minutes. I baked mine for 30 and thought it needed a little longer. The crust is likely to go quite dark, but that’s okay.
  8. Finally let the dough cool on a wire rack (must allow air flow underneath!). This finishes the cooking process.

Concluding remarks: Folding the dough and shaping into a boule are the only two challenging parts to this method. If you wanted to try scoring the dough (which ideally you would) that happens just before the dough goes in the oven. I just haven’t figured out how to yet (maybe my knives aren’t sharp enough?). Anyway enough for now.

A Staple: Potato Bread

Potato bread
Potato Bread

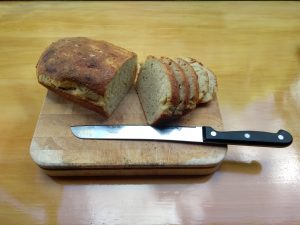
I’m definitely no bread expert, but I’ve made a lot of it. Playing with dough is frickin’ satisfying. Over the past few months I’ve moved outside normal bread (flour, water, salt and yeast) into bread with kumara or potato. I was skeptical at the start as to whether the bread would still hold up structurally, but I’ve found it not to be too bad. The result is a moist crumb (interior part of the bread) and a firm crust (depending on how you bake it).

I made an error with this loaf as I overstretched the gluten to get it into the loaf tin; it would have been better off baking it straight on a tray or a Dutch oven. Despite this mistake, the bread still turned out mean – the crumb had good depth of flavour and was soft and moist. I think this recipe is a pretty difficult one to screw up which is what I like about bread baking; there’s so many ways to do it right and the bread usually turns out pretty well even if you’ve messed up. On the flip side, there’s heaps of ways to do it wrong, and I’ve had my fair share of those (including my first time making bread where I put 16g of salt into the loaf and ended up with a salty brick). But you have to be doing something really wrong to get it wrong.

Possibly the thing that bugs me the most about recipes and baking is when people use cups as their measure rather than grams (or other weight). The variability in the amount of flour in 1 cup will definitely change the texture of your bread and that makes it so difficult to improve because you don’t really know what effect other changes might have had on your bread. Get a weighing scale.

The good news is that bread can be 65% hydration (65g of water to 100g of flour) all the way up to 100% hydration (100g of water to 100g of flour) and if you treat it right, it will still bake successfully and be good to eat.

So let’s get cracking.

Potato bread (vegan)
Serves: 4 (might get around 8-10 slices, but depends how you bake it)
Hands-on time: 15-20 minutes
Hands-off time: 4 – 24 hours
Cooking time: ~30 minutes

Ingredients:
1 or 2 medium Agria potatoes (other varieties will work, but floury potatoes are best)
~400-500g high-grade flour (depending on the weight of potatoes)
Water (depends on flour and potatoes – we’re gonna go 60% hydration)
1/4 tsp yeast
1/2 tsp salt
1 Tbsp olive oil (or other oil)

Instructions:

  1. Cook the potatoes. Not fussed how you do this, whether you use leftovers or otherwise. If you use boiled potatoes or leftover mash you may want to reduce the water later on by a small amount, nominally 25g (or if not, it doesn’t really matter!). I suggest the fastest most efficient way is cooking them in the microwave. Stab the potato 3 times on both sides with a paring knife and microwave for 3.5 minutes per side.
  2. Take the skin off the cooked potatoes and mash the potato. I used a potato ricer but this isn’t necessary.
  3. At this stage I salted the potatoes with about 1/2 tsp of salt but just use a pinch or a small amount. You could add the salt to the flour instead; I don’t think it would make any difference.
  4. Weigh the mashed potatoes and measure out 3.5x the weight of the potato in flour (e.g. 100g of potatoes needs 350g of flour). The moisture in your potato will change the texture of the bread, but a ratio of 3.5 is pretty safe.
  5. Now measure out 0.6x the weight of the flour in water (e.g. 350g of flour needs 210g of water).
  6. Add the 1/4 tsp of yeast to the flour (this may take up to 24 hours till it’s ready to bake, so if you need the bread sooner, use a bit more yeast. If you need it within a few hours, warm your water, then add 1 Tbsp yeast and a touch of sugar to the water and let it bloom for 10 minutes before continuing).
  7. Mix all your ingredients together in a big bowl: flour + yeast, potatoes + salt, water and 1 Tbsp olive oil.  Bring together initially by mixing with a butter knife or your hand then turn it out onto a surface and knead for 5 minutes. The dough will be moist and sticky due to the potato starches – don’t add more flour. Regardless of how moist it feels, it will still come together and make good bread. The dough will not become smooth like it might with normal bread; I think the kneading is just important to ensure everything is evenly mixed. There is often no need to knead normal bread other than for fun (but definitely a reason to need it!)
  8. Once somewhat smoother than before, place the dough into an oiled container, cover and let sit until it roughly doubles in size (4-24 hours). If you need it to double faster, put the container into the oven at 50 degrees C  or the lowest setting and turn off the oven when it reaches temperature. The depth of flavour of the bread will be better the longer you leave it to rise.
  9. Once doubled in size, it will now be a smooth dough. Knock the dough down a bit and place into a greased loaf tin, or shape into a ball and place it on a baking tray smooth side up. Let it rise again for about 20-30 minutes, then heat the oven to 220 degrees C.
  10. Cook for around 30 minutes or until it sounds hollow to knock on the top. You can cook it for a bit longer if you want a firmer crust or a bit shorter if you want a softer crust, but 30 minutes should be pretty safe.
  11. Cool on a wire rack or other item such that there is airflow underneath the loaf. This step is important as if finishes off the cooking process, just like resting a piece of meat.

Concluding remarks: It’s a slow process, but you learn and gain experience each time you bake. The bread will probably turn out differently every time, but that’s fine because it will still taste pretty good! The most important thing is to have fun along the way.